Showing posts with label diy. Show all posts

Wednesday, April 1, 2015

Baby Plants


We ordered 44 packets of food seeds from Baker Creek Heirloom Seeds for this year's garden (they sent us 2 free extra packets so we have 46 food seeds to start now!).  And we also ordered 11 packets of flower seeds because I want to have cut flower bouquets all summer long this year.  

It cost us about $100, but we hopefully will be overflowing with produce this summer and not do much grocery shopping.  And maybe we'll even be able to sell some of our bounty.  Plus a lot of the seed packets had enough that we can use the seeds for next year's garden as well.

We have MAJOR garden plans this year.  MAJOR.  Our garden will probably be the same square footage of our house.  A lot of that will be allowing enough space for the things that will take over (pumpkins, squash, & cucumbers), but still.

Now we are not crazy people, we are not digging up that much sod in one year.  Corey found a method where you cover up the grass with newspaper or paper grocery bags and just cut holes for each seedling.  Then the grass dies and the next year it's easier to incorporate it as compost.  So we're going to go that route.

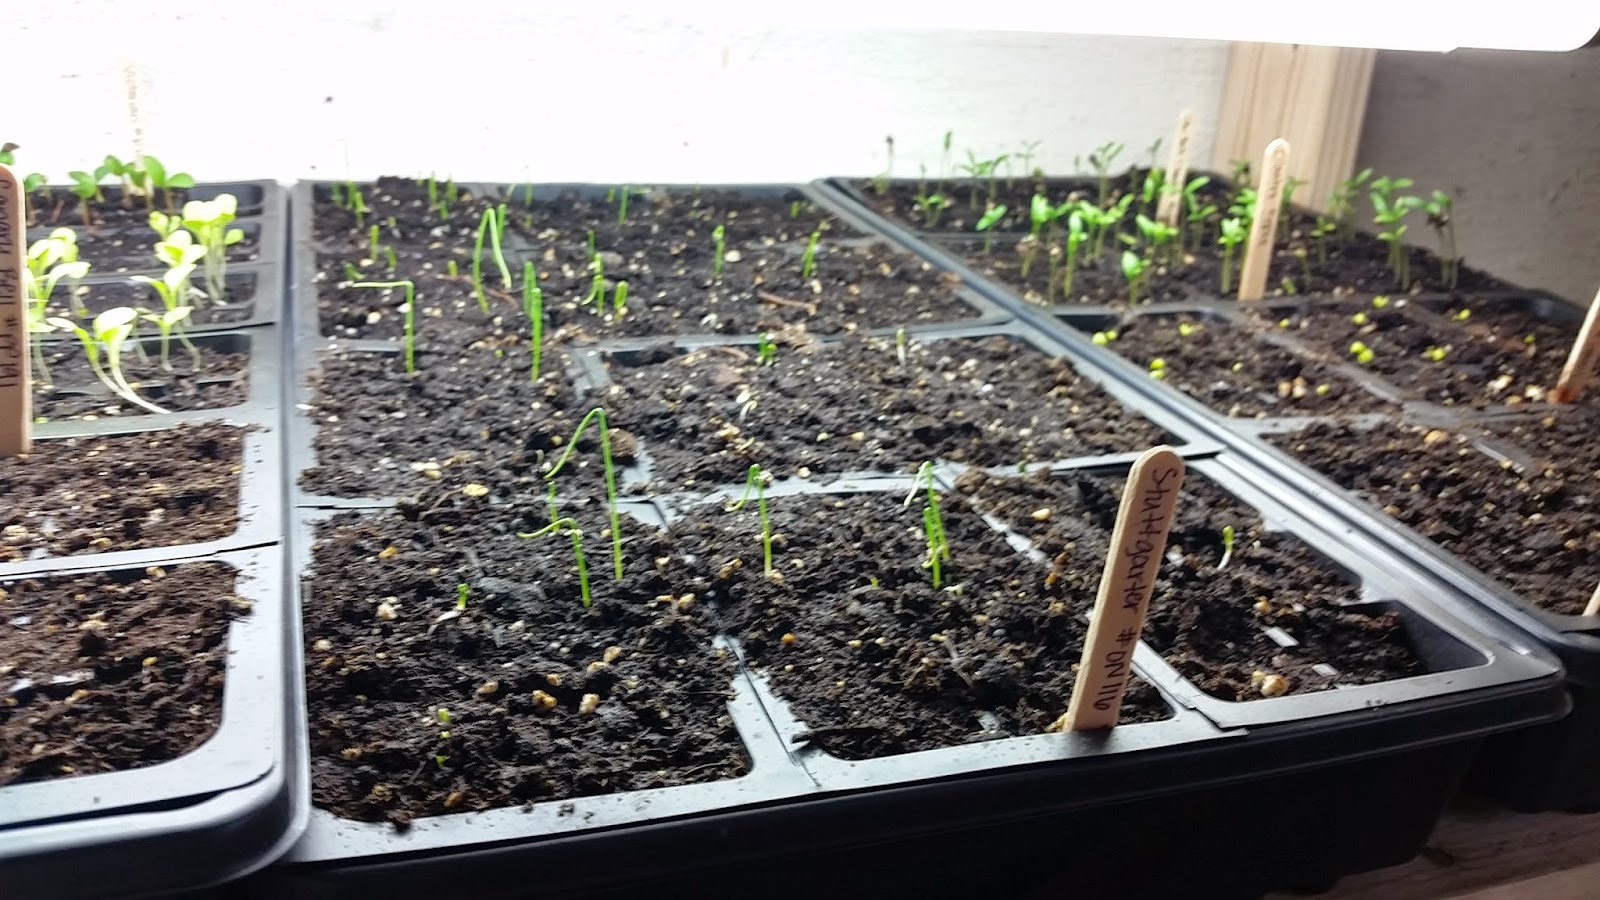
The seeds were so minuscule for some of them we had to use tweezers to plant them!  So far we have only started tomatoes, peppers, basil, cilantro, chives, asparagus, lettuce, onions, and petunias.  I think we have more due to start this weekend.

3/18


3/24


We bought organic potting soil and fluorescent lights at Menards and ordered plastic seed trays & popsicle sticks from Amazon. 

Corey built the wooden stand to hold all the trays & lights.

3/29
Lettuce won for first sprouted


3/30
onions

We put our heating pad under the peppers to warm up the dirt more in hopes of encouraging sprouting

tomatoes!


4/1

Soon I will be buried in tomatoes...13 different varieties!

I hope the basil takes off soon

Weirdly bent over onions

Tiny baby pentunias

So far there's only one pepper sprouted

In three years we'll actually be able to harvest some rhubarb


Friday, February 20, 2015

Easy DIY Bathroom Towel Hooks


Once we made the coat hooks both Corey & I wanted to use the extra scrap to make some hooks for the bathroom.  

Right now we just have one right by the shower and putting two towels on it is annoying.  Plus now we both have robes (which is very luxurious and I don't know why I waited so long to buy a white terrycloth robe.  Best random Ikea impulse purchase!) and there's no where to hang those either.

Since we ended up making the coat rack smaller than I had been planning we had four hooks leftover from that project which is the perfect amount for these bathroom hooks.

This was so easy to do because we didn't want the extra shelf on top.  So here's the step by step:


Step 1: Play around with measurements until you're happy and know how long you want your board to be


Step 2: Cut your board to the right length


Step 3: Route the edges to be fancy


Step 4: Stain or paint your piece

Step 5: If it's going in a bathroom you should put on a coat of polyurethane (omg I spelled that right on the first try!)


Step 6: Get your hooks where you want them and trace the hook and make marks for the screw holes

Step 7: Pre-drill the screw holes one hook at a time

Step 8: Use a screwdriver to carefully put in the screws.  Repeats steps 7 & 8 until all your hooks are in


Step 9: Since we have lathe and plaster walls we need to use toggle bolts (also called molly bolts) to hang things like this on the wall (it's very hard to find studs to screw into with the wood lathe boards in the way).  We used two to hold this up and strategically placed them to be behind the hooks.  We used a countersink bit so that the head of the screw would be flat under the hook plate.  Pre-drill the holes and countersink them.

Step 10: Screw in the toggle bolts. Corey did this alone while I was gone so there aren't any pictures of the process. See this post for more detailed pictures


Step 11: Put the hooks back on and voila the bolts are covered up and the hooks are held to the wall by magic!


Step 12:  Hang that shit uuuuuuup

Next up for the bathroom is making some DIY rustic picture frames for 4 mini-prints I have.  I want to hang then in a row above the towel hooks.


Wednesday, January 7, 2015

Christmas Tree Skirt


I made a Christmas tree skirt!  I have been wanting to make one for the past couple of Christmases.  I used this tutorial.  It wasn't very detailed, but it was a good place to start and I was glad to see I could do a hexagon instead of a circle.

Step 1: Cut all of your strips.  I did 2.5 inches wide by 18 inches long.  You need 36 strips.

Step 2: Sew your strips together into 6 different rectangles and then iron the seams.

Step 3: I got to use the 60 degree cutting line on my cutting mat for the first time!

Cut the rectangle off along the 60 degree line on each side.

Kittens make it a lot harder to get projects done:

Step 4: Trace around the trapezoids from the top to make the middle and backing trappezoids.  Again, cut six.  

I finally got to use my scraps of extra batting!  I've been saving them knowing I'd find a use for them some day.

 And do the same with your backing fabric.

Step 5: Then sew the 6 pieces together into a big hexagon, but leave one side open to get it around the tree.


 Do it with the batting layer and the backing layer.

Step 6: Put the three layers together and pin

Step 7: Then the quilting begins!  I did something new this time.  Instead of quilting in the "ditch" I did two lines on each side of the "ditch."  I did stitch in the "ditch" going down between all of the trapezoids.
Front-
Back-


Step 8: I used satin blanket binding this time instead of the new fabric binding that I've been doing.  This tree skirt isn't going to take much abuse or need to be washed that much, plus I have a lot of extra satin binding that I need to use up.


Because of the angled corners I was left with some extra bubbling.

I pinned it down nicely and sewed my way around the skirt:

Then I went back to each of the corners and sewed down the extra little flap because it stuck up when it wasn't pinned.  I tried my best to connect to the other sewing line so it didn't look out place:


Here it is in place!

I have a lot of fabric left over which I am happy about.  I  bought extra on purpose because I have plans for a Christmas quilt.  I love the idea of a special quilt that only comes out with the decorations.  I think I'll make it as my next project because I'm in a Christmas-y mood and I am want to quilt something new.  Stay tuned!

Friday, December 19, 2014

Fixing Up A Wood Table Without Refinishing It

 The day before Corey's birthday dinner I set aside the whole day for cleaning (well 80% cleaning and 20% food prep).  That shows you how dirty my house was.  When I get on a roll with something I get A LOT done.  One of the random unexpected things I did once I got into Cleaning Mode was fix up my wood dining room table without refinishing it. 

This table was the table my mom used growing up and that I used growing up.  My brother used for awhile, too.  The point is that it's old and it's seen a lot of abuse.  Here is the sorry state of before:

This is the table with all of the leaves in it which is why the one part is so much darker than the others.  It is the least-used leaf.

Materials I Used:
  • razor blade
  • vinegar
  • olive oil
  • Vaseline
  • Formby's lemon oil

What an odd list, huh?  I used some pins I had pinned on Pinterest to plan my attack.

1. First I mixed a 50-50 mixture of vinegar and olive oil because Pinterest told me to.  I wiped it all over the table and it gave everything a nice sheen and cleaned it up a bit.

2. Then I put Vaseline on all the white water damage spots because Pinterest told me to.  There were a LOT of these spots.  I put Vaseline on any sort of discoloration and it worked wonders.

3. Then I slowly scraped off the paper spot with a razor blade.  Then I put Vaseline on it and let it sit for awhile.


I got down to the actual LETTERS from whatever that paper is!  I ever so carefully scraped them off too and it's like the paper was never there!


Then I wiped off the Vaseline in all the areas that it hadn't fully soaked in.  It did wonders on all but the very worst spots!  It must put some moisture back into the wood or something so they don't look so light anymore.


Finally I put on a coat of Formby's lemon oil treatment.


I can't believe how much better it looks!  Those really bad spots probably need to be refinished, but for a little bit of work it looks a million times better.


Here is the table all set the night before the birthday dinner:

And here is a before and after: