Monday, April 20, 2015

And the Wall Comes Down...Part 1


Our beautiful basement view of the sunset

As I've mentioned before (here and here), we are using this spring and summer to do some Kitchen Renovation Prep before we (hopefully) start the full demo and rebuild Labor Day Weekend.

The biggest part of this renovation is taking down the wall between the Kitchen and Dining Room.  It is a load-bearing wall, so we need to replace it with a structural support beam up at the ceiling.  But as my Dad pointed out recently, we could take down the lathe and plaster now and just leave the studs up until we are ready to put up the beam.  I am really looking forward to having that wall down so I jumped at that idea!

All of my nephews and one of my nieces (surprisingly the baby doesn't care much) have been very excited about the idea of helping to take down the wall (destruction is the fun part for all ages), especially my littlest nephew who was asking me about it ALL THE TIME.  So I waited until they could come to help and my Mom & Dad could come direct and this past Saturday was the day.


This was really fun and went way faster than I thought it would and was way messier than I thought it would be.  But now when we get into full demo mode this Fall I will have a better idea of what to expect.  All the dust everywhere forever.


We haven't taken all of it down, we left everything up around the bathroom "hallway," part of the top on the kitchen side, and most of the chimney, and I'm not sure when we'll finish that.  Maybe we will soon before we put the beam up or maybe just as part of that project.


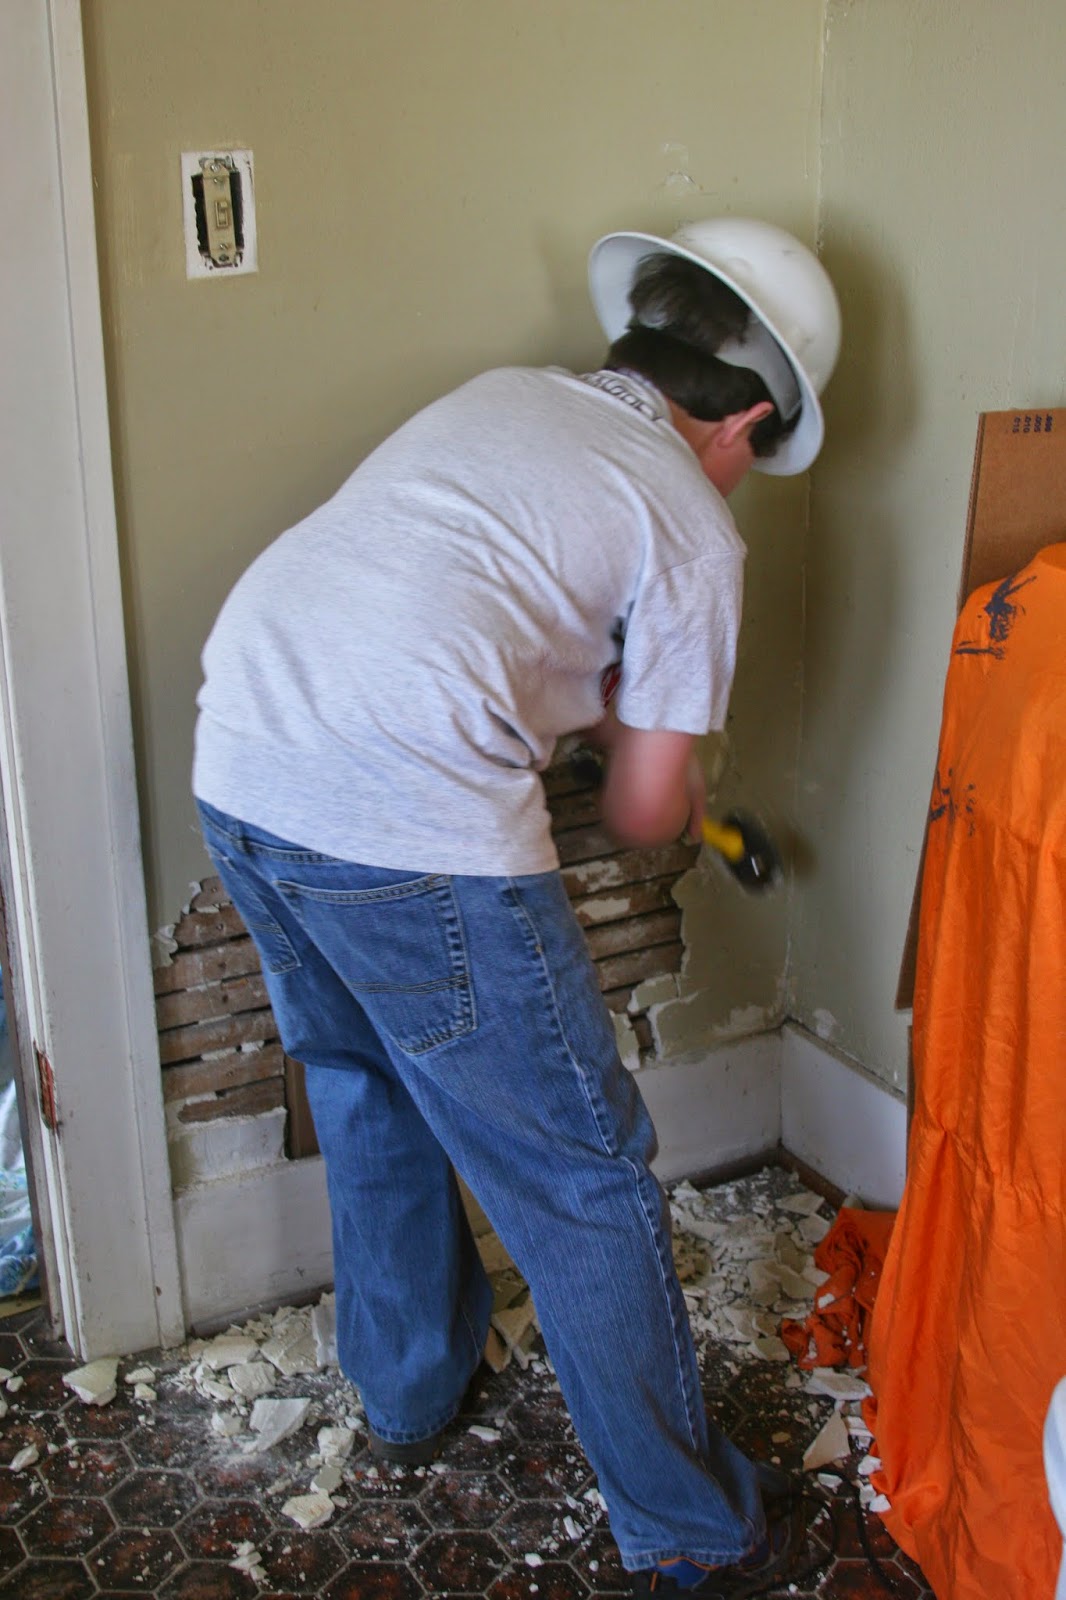
We just whacked at the plaster with various tools to break it into pieces and then pried the pieces off the lathe, and then went back and pried all the lathe off the studs (once the wood trim was down).


#teamwork
My dad has an incredible gift of patience when it comes to doing projects with little kids around.  He always figures out a way to have them involved and feel proud of how they're helping.  He doesn't get frustrated with their questions or how their involvement makes the project take longer.  He just enjoys sharing his knowledge and spending time with the little ones.  My dad is pretty much the best!


At a certain point we had to carefully pry off the nice original wood work.  We are saving it and can hopefully use it when we add a second bathroom to help it look original to the house.  Once we had the trim off getting the lathe off was much easier.


Grandson, Son, Father, Grandson
This is what it looked like when stopped for the day:

SO OPEN!

And here is what it looks like today after Corey & I did some more work on our own:


This is the lathe that we took down.  This is from part of one wall so when we do the full demo....oy vey
The small amount in the box has the nails removed #tedious

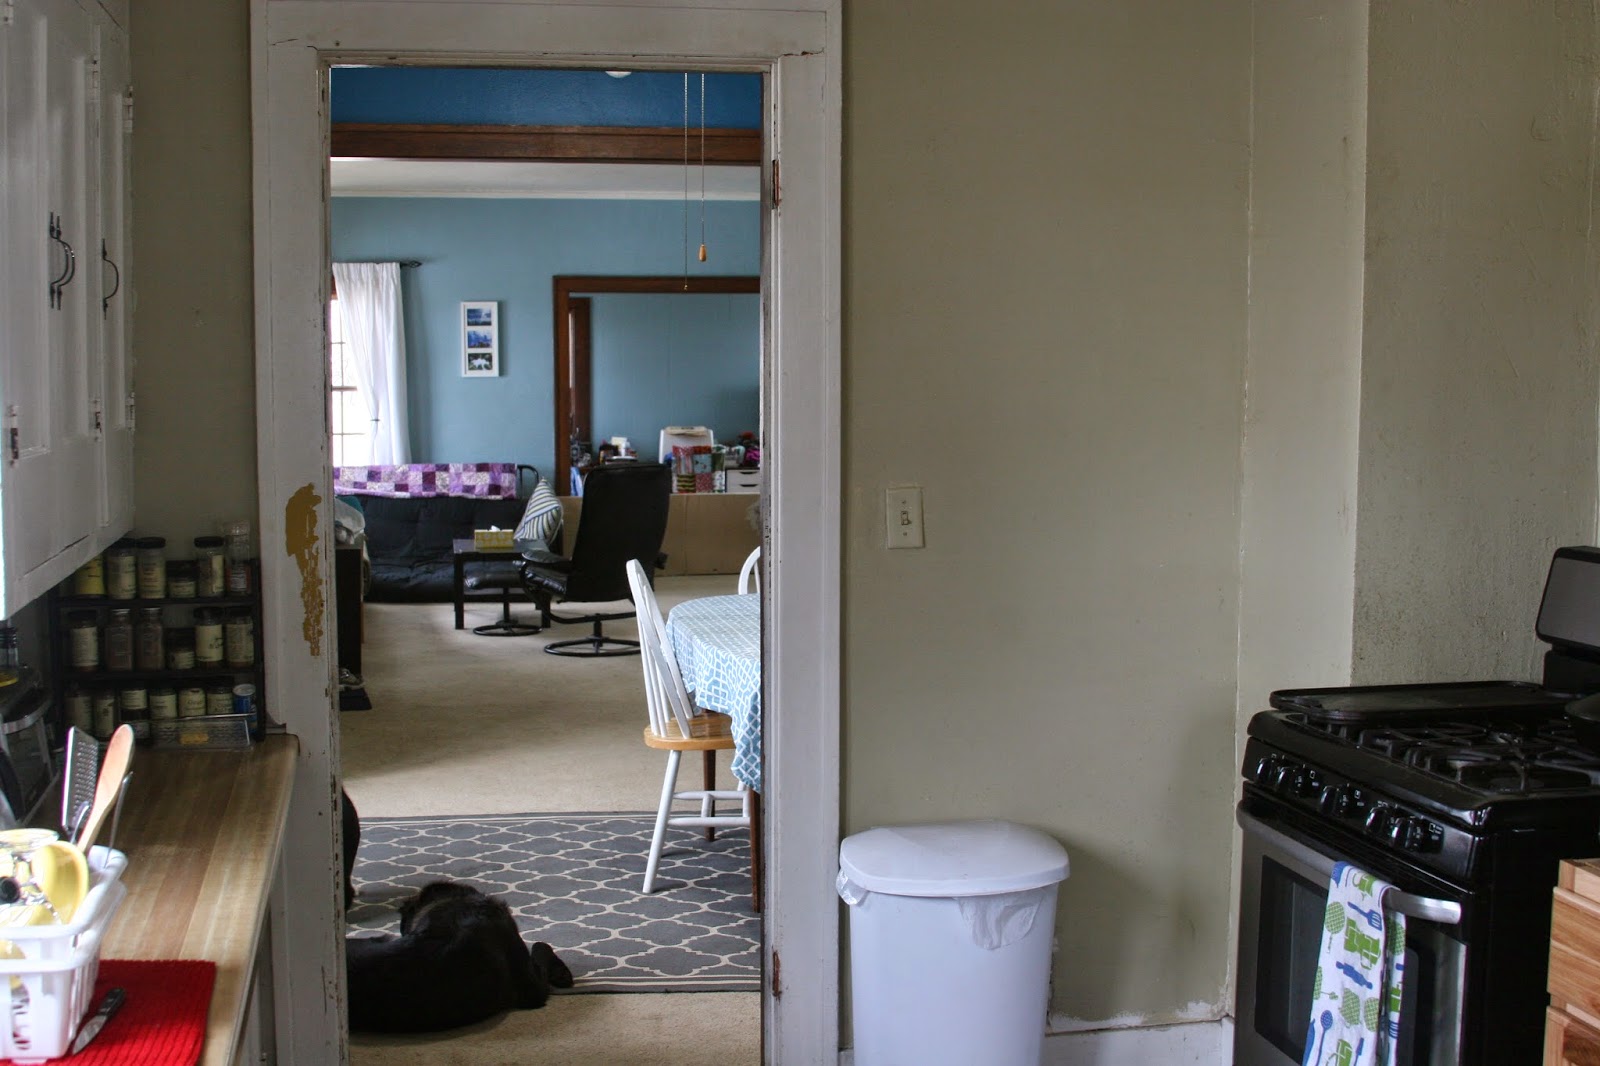
And here is the view from the Kitchen side:


We still have to finish getting the plaster off of the brick and up towards the ceiling (we can't touch the lathe & plaster on the left because we are still using the cabinets).

Here's a quick Before & After for ya:


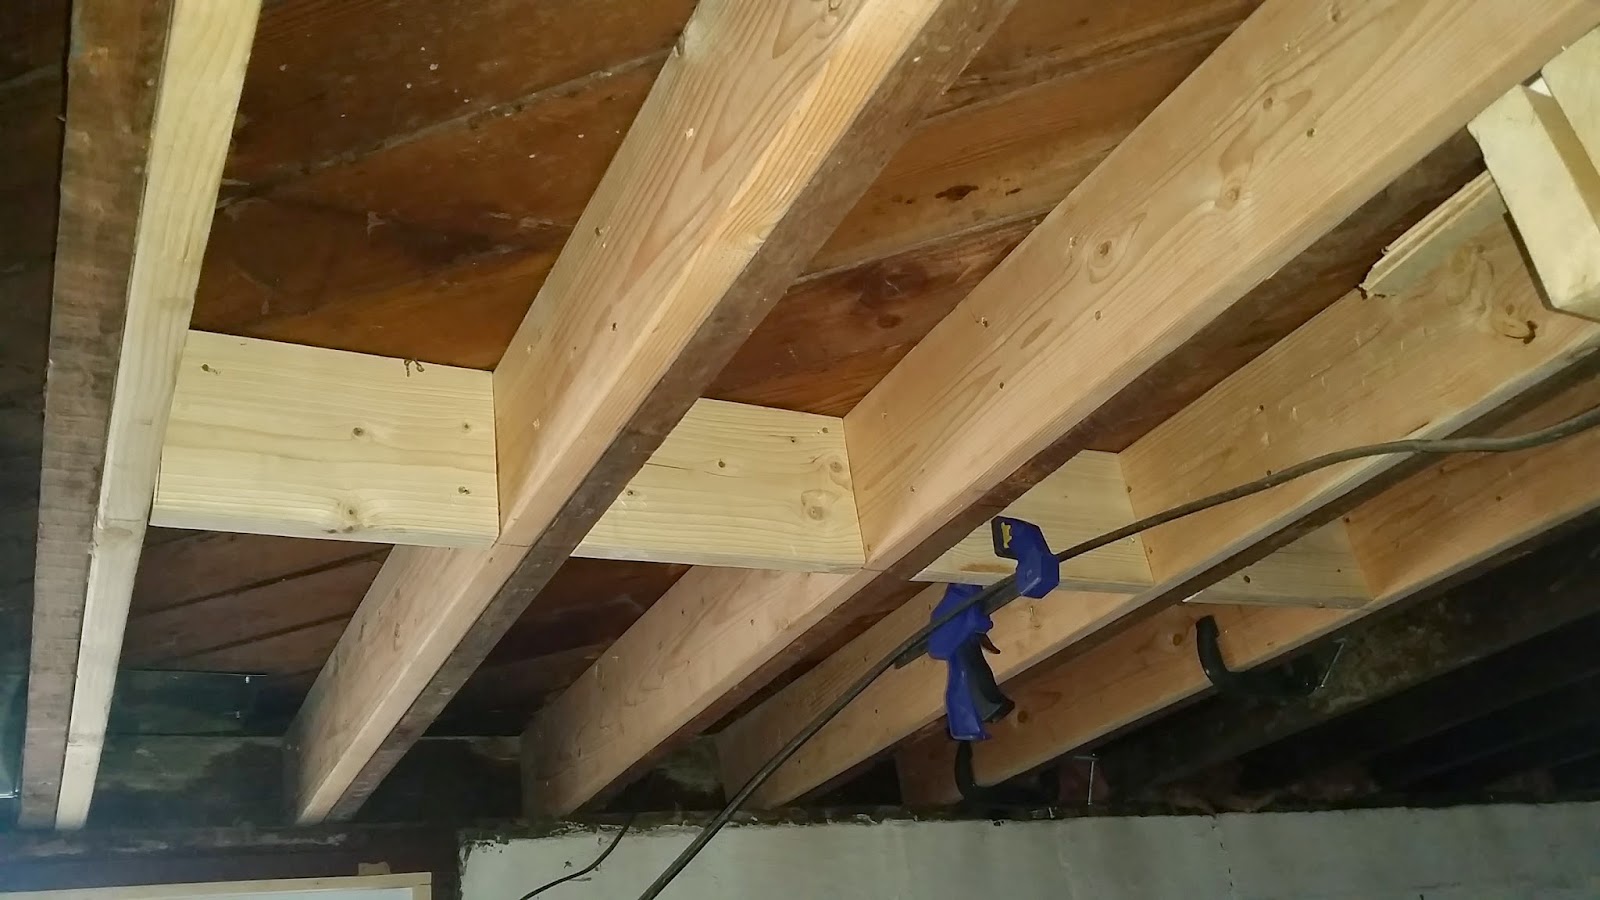
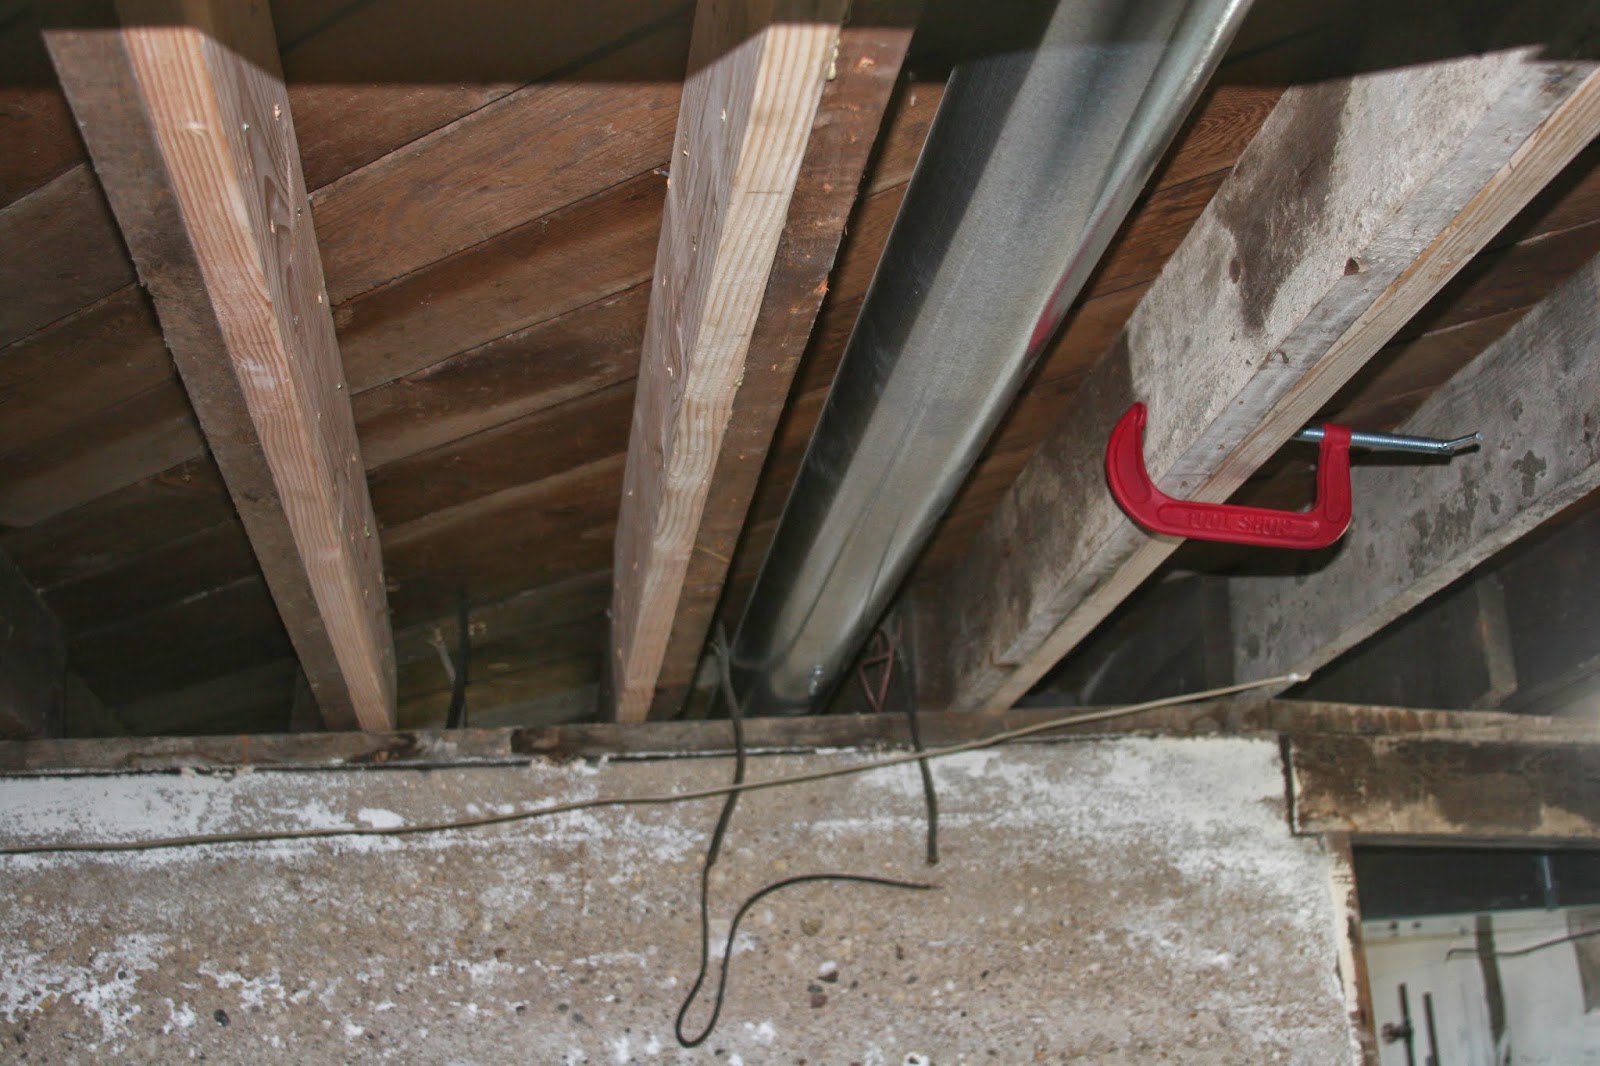
While the wall was coming down there was also a 2nd unit working on Part 3 of the Great Floor Shore-Up (#multitasking).  Part 2 will be up on the blog Wednesday.

It already feels so much bigger in the kitchen and the stove area gets so much more light.  I can't wait to have to have 100% of this wall down!  I can't wait to have the kitchen redone!  I can't wait to have the wood floors refinished!  I can't wait to have a real couch!  #justkeepswimming

Wednesday, April 8, 2015

Vacation!


I am typing this on my phone from the airport. Crafty Homestead is on vacation!  I should have a post up next Friday :)


Wednesday, April 1, 2015

Baby Plants


We ordered 44 packets of food seeds from Baker Creek Heirloom Seeds for this year's garden (they sent us 2 free extra packets so we have 46 food seeds to start now!).  And we also ordered 11 packets of flower seeds because I want to have cut flower bouquets all summer long this year.  

It cost us about $100, but we hopefully will be overflowing with produce this summer and not do much grocery shopping.  And maybe we'll even be able to sell some of our bounty.  Plus a lot of the seed packets had enough that we can use the seeds for next year's garden as well.

We have MAJOR garden plans this year.  MAJOR.  Our garden will probably be the same square footage of our house.  A lot of that will be allowing enough space for the things that will take over (pumpkins, squash, & cucumbers), but still.

Now we are not crazy people, we are not digging up that much sod in one year.  Corey found a method where you cover up the grass with newspaper or paper grocery bags and just cut holes for each seedling.  Then the grass dies and the next year it's easier to incorporate it as compost.  So we're going to go that route.

The seeds were so minuscule for some of them we had to use tweezers to plant them!  So far we have only started tomatoes, peppers, basil, cilantro, chives, asparagus, lettuce, onions, and petunias.  I think we have more due to start this weekend.

3/18


3/24


We bought organic potting soil and fluorescent lights at Menards and ordered plastic seed trays & popsicle sticks from Amazon. 

Corey built the wooden stand to hold all the trays & lights.

3/29
Lettuce won for first sprouted


3/30
onions

We put our heating pad under the peppers to warm up the dirt more in hopes of encouraging sprouting

tomatoes!


4/1

Soon I will be buried in tomatoes...13 different varieties!

I hope the basil takes off soon

Weirdly bent over onions

Tiny baby pentunias

So far there's only one pepper sprouted

In three years we'll actually be able to harvest some rhubarb


Monday, March 30, 2015

The Great Floor Shore-Up Part 1

Puppy comfort is very important...I brought their dog beds downstairs because cement is chilly!


Our house is shaky.  Crazy shaky.  As I said in this post, the floor shook so much it made a pile of picture frames fall off the dining room table as I walked by.

The reason for this is that our floor joists need help.  Our basement is unfinished so we can see all the damage.  Many of the joists have been cut, are unsupported, or were fixed badly.

Here are several joists are cut and pieced together:


This joist is completely cut and there was just a little wood patch over it:


This is where the original gravity furnace was and they patched up the hole without having board go all the way across the span:


So the process that we started recently is reinforcing every single joist.  I ordered 26 fourteen foot long boards and had them delivered.

On the first day we got 6 of them up, but we have figured out a way to get them up faster next time.  Hopefully it will only take 2 more Saturdays to finish.  Part 2 is taking place this Saturday so we'll see.

Though the next 6 that we need to do are all tricky because some electric & plumbing needs to be moved and there's a weird situation where the old furnace used to be.  So we might only get 6 more done because those will take more time to do.

Before we can fix these ones we have to move the plumbing and electrical out of the way:


And we have to fix this part carefully because the hardwood floors are nailed into them so we can't just bash out short boards and put in long ones.  (Even though this was patched we cut a hole in the carpet upstairs and put a camera in the hole and it looks like hardwood and not plywood so PHEW!)


So here's how you reinforce floor joists.

Step OneMake the board is the right size and make some cuts if necessary.  Knock out the old blocking between the joists so they're out of your way.  And brush off the old joist and the new one so there's no dust/spiders/sawdust in between the glue bond.

Step Two:  You need a temporary short girder to shore-up the floor and take out some of the sag of the floor.  We used 2 floor jack posts and used the girder from when my brother did this same project.  You get it set up and then turn the jack part of the post up to raise up the floor joists.  If you have two girders and 4 posts you can get more done in a day because the posts need to stay up for 24 hours.


Step Three: Then put construction adhesive on the board.  Don't make complete circles, because then you trap air in between the boards.


It's important to have a puppy who lays right in the middle of everything:


Step Four:  Put the board up and start clamping!  Make sure when you put the board up you put the crown (the high point) of the board facing up (touching the subfloor). If you're like us the board won't go up because the floor is bowed and your board is a little too tall so you have whack it with a sledgehammer to force it up until you are about to die (this is why we only got 6 up).

You want clamps with a big jaw so you can get the bond tight higher up on the boards:


Step Five:  Then you start screwing and nailing.  Start with coated deck screws and put screws in every foot and half.  In between all the screws you put in nails.  We used an intense framing air-nailer with hot dipped galvanized ring shanked framing nails (they have special glue on them). 


 Brave Allie came down into the basement for the first time!  She was so scared of the scary loud banging, but she felt safer down by us then upstairs listening to the noises alone.


Step Six Now you need to put up new blocking between the joists since in the beginning you knocked out the old blocking.  Originally we only had one row of cross-braced blocking in the center of the floor, and we replaced it with two rows of solid blocking both off-center.  Blocking is good because it ties all the joists together to spread out the weight of the floor.


Step Seven:  Enjoy your non-shaky floor!  Leave the floor jack posts up for 24 hours while the construction adhesive sets up and dries.